Do I need a permit for a shed in Renton?
This is probably the most common question I get, and it’s a good one because you definitely don’t want to mess around with permits. Generally speaking, in Renton, if your shed is 200 square feet or less, you usually don't need a building permit. That’s a pretty standard size for a lot of backyard sheds. However, there are always exceptions, and it’s not just about size. You might still need other types of permits, like a clearing and grading permit if you’re doing a lot of earthwork, or if your property is in a critical area like near a wetland or steep slope. Even if it’s under 200 sq ft, if you’re planning on adding plumbing or electricity, that’s a whole different ballgame and you’ll absolutely need permits for that work.
My advice? Always, always check with the City of Renton Planning Department. Their website has a lot of good info, but a quick call or visit can save you a ton of headaches down the road. It’s better to be safe than sorry, especially when you’re dealing with city regulations. Don't just assume; verify.
What kind of site prep do I need to do before my shed arrives?
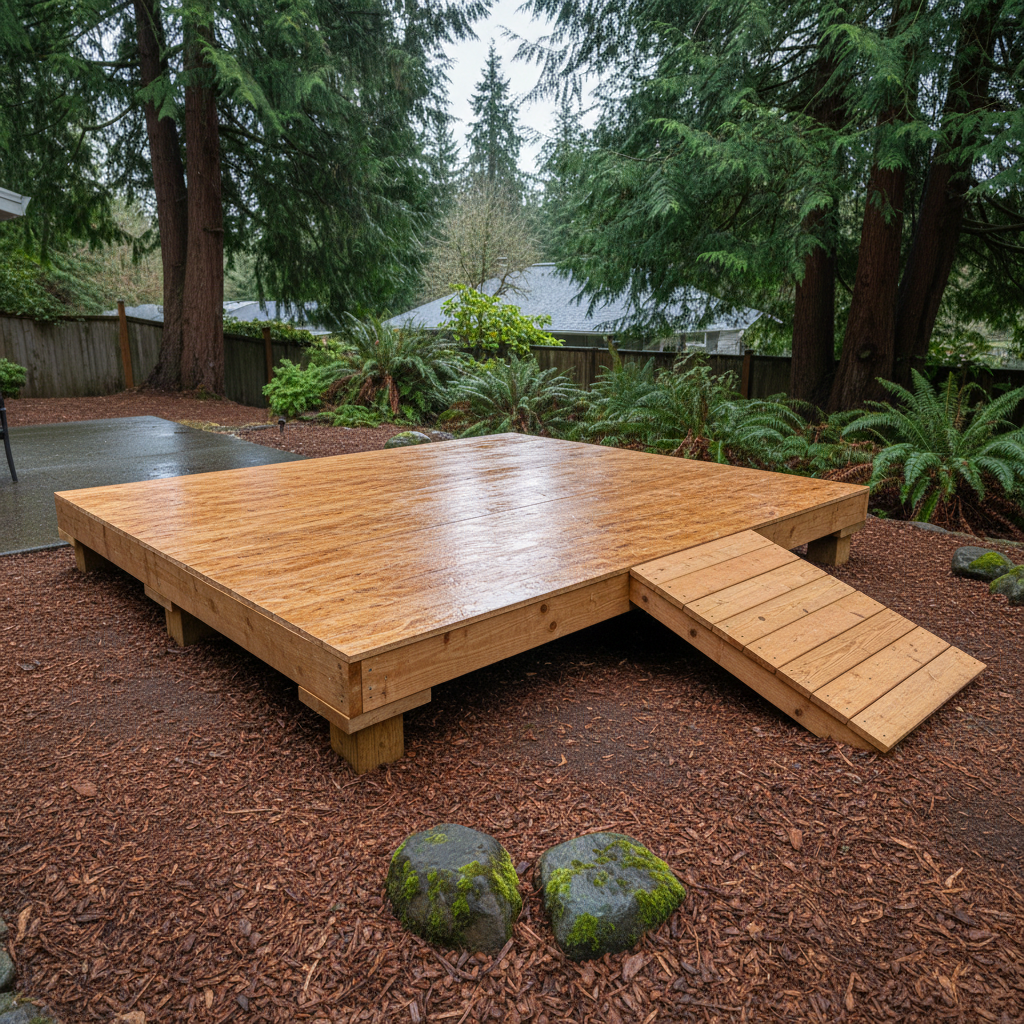
Alright, this is crucial. A good foundation is everything for a shed that’s going to last. You can’t just plop a shed down on uneven ground and expect it to hold up. Here’s what you’re generally looking at:
- Level Ground: This is non-negotiable. Your site needs to be as level as possible. We're talking within a few inches across the entire footprint of the shed. If it’s not level, your shed won’t sit right, doors will stick, and the whole structure will be under stress.
- Drainage: Think about water. We get a lot of rain here in Renton, and you don’t want water pooling around or under your shed. The site should ideally be slightly elevated or have good drainage away from the shed. Sometimes, a gravel base helps a lot with this.
- Clearance: Make sure there’s enough room around the shed site for us to work. We need space to maneuver the shed sections and use our tools. Clear out any bushes, low-hanging branches, or other obstacles.
- Access: Can we actually get the shed to the site? If we’re delivering a pre-built shed, we need a clear path from the street. If it’s a kit we’re assembling on site, we still need to get materials in. Think about gates, narrow pathways, and overhead obstructions.
We can talk through your specific site when we do a consultation, but generally, a well-drained, level, and accessible spot is what we’re looking for.
How long does shed installation usually take?
This really depends on the size and complexity of the shed, and whether it’s a pre-built unit we’re just setting in place or a custom build we're assembling from scratch. If it’s a smaller, pre-built shed that just needs to be dropped onto a prepared site, we can often have that done in a few hours. Easy peasy.
For a larger, custom-built shed that we’re constructing on site, you’re looking at more like 1 to 3 days, sometimes a bit longer for really big or complex designs with lots of features like windows, multiple doors, or interior finishes. Weather plays a role too; if it's pouring rain, we might have to pause or slow down. We always give you an estimated timeline upfront, and we do our best to stick to it.
What kind of foundation options are there for sheds?
You’ve got a few main choices, and the best one for you depends on your shed’s size, weight, and your budget:
- Gravel Pad: This is a popular and cost-effective option for many smaller to medium-sized sheds. We lay down a few inches of compacted gravel, often contained by a treated wood frame. It provides good drainage and a stable, level surface.
- Concrete Slab: For larger, heavier sheds, or if you plan on storing really heavy equipment or want a super durable floor, a concrete slab is the way to go. It’s more expensive and takes longer because of curing time, but it’s incredibly strong and permanent.
- Concrete Blocks/Piers: Sometimes, especially on slightly uneven ground, we can use concrete blocks or pre-cast piers to support the shed's floor joists. This allows for good airflow underneath and can be adjusted for level. It’s a good middle-ground option for many sheds.
We’ll discuss the best foundation for your specific shed and site during our initial chat. We've built sheds on all sorts of foundations around Renton, from the flatlands near the Cedar River to the hillier areas up by Fairwood, so we know what works in different conditions.
Can you deliver a shed over fences or other obstacles?
Sometimes, yes, but it depends on the obstacle and the shed. If you’ve got a standard 6-foot fence, and the shed isn’t too big, we might be able to use specialized equipment like a shed mule or a crane to lift it over. A shed mule is basically a motorized dolly that can navigate tight spaces and rough terrain, and it's pretty amazing what those things can do.
However, if your fence is super tall, or there are power lines, trees, or other structures in the way, it gets a lot trickier and sometimes impossible. Cranes are an option for really tough spots, but they add significant cost. This is why a site visit is so important. We need to see your yard and access points to figure out the best, safest, and most cost-effective way to get your shed where it needs to go. Sometimes, the only option is to build the shed on site, which Custom Sheds of Renton is set up to do.
What if my yard isn't perfectly flat?
Like I said before, a level site is key. If your yard isn’t perfectly flat, don’t worry, that’s pretty common. Most yards have some slope to them. We can usually handle minor slopes by building up a gravel pad or using adjustable concrete blocks to create a level base. For more significant slopes, we might need to do some more extensive grading or even build a small retaining wall to create a flat area for the shed.
It’s all about getting that foundation right. We’ll assess the grade during our site visit and recommend the best approach to ensure your shed is stable and lasts for years, even with the typical soft, clay-like soil we often find in areas like the Highlands.
How far in advance do I need to order a shed?
Lead times can vary quite a bit depending on the time of year and how busy we are. Spring and summer are usually our busiest seasons, so if you’re planning on getting a shed installed then, it’s a good idea to reach out a couple of months in advance. This gives us time to do a site visit, finalize your design, get any necessary permits sorted (if applicable), and schedule the build or delivery.
During slower times of the year, like late fall or winter, our lead times might be shorter, but you still want to give us at least a few weeks. Custom builds always take a bit longer to plan and execute than a standard pre-built model. The sooner you get in touch, the better we can plan and make sure your shed project goes smoothly.
Do I need to be home during installation?
For the initial site visit and to go over the final plans, yes, you definitely need to be there so we can walk through everything together. On the actual installation day, it's helpful if you're available, especially at the beginning, just in case any questions come up about final placement or access. Once we get going, you don't necessarily need to be hovering over us the whole time.
As long as we have clear access to the site and you're reachable by phone, we can usually get the job done. We'll let you know our schedule and when we expect to be finished. We're pretty good about keeping things tidy and respecting your property, so you can trust us to get the job done right even if you're not watching our every move.